I've just finished a 3 day clean up of my
textile studio and between refolding all the fabrics to prevent fading, sorting colours and boxing threads I decided it was good timing to do a studio blog. We live in a 2 bedroom apartment of about 11 squares (about 102 sq metres) so
innovative space consumption is paramount. Cost was a major factor too, so most of the
storage ideas are budget friendly.
Click pics to enlarge.
The sewing studio in in a smallish second bedroom with one wall at an odd angle which made organisation a bit tougher. Here's the view from the door:
We live on a main road - so great lighting and an ever changing view. The downside is it's always of traffic and the heat coming in these east facing windows is quite amazing during the warmer months!
The desk is a Horn Magic box - both wings fold into the centre and the entire front and middle fold into the box the TV is on. This doesn't happen often though! The sewing machine shelf is height adjustable with an acrylic insert for flatbed sewing (my machine is currently having a holiday with a technician).
I've found most horn cabinets to position you to either side of the machine needle, I love this one as you can sit right in front and the cutout is large enough for the new, longer throat machines.
The Sew-Easy table and ironing board fit well inside the T shape of the Horn desk.
A second Sew-Easy table in front of the window provides an alternate work area and also a good spot to photograph smaller artworks from.
I had a friend make a full acrylic insert for one of the Sew-Easy tables, so when I'm quilting larger pieces there's no gap for them to get caught up in.
An open backed ornament wall display unit purchased from a home-wares store for $20 makes good fat quarter storage and all my fabric glues are kept on top.
Under the right wing a chipboard cube fits a woven basket for plastics while a present from my Mum - the Madeira Treasure chest fits beautifully on top. (All luck here, I made the chipboard cube as a stand for a record player when I was about 16!) The Madeira treasure chest comes filled with the most gorgeous collection of Rayon threads.
I had 3 untreated pin bookcases made and delivered for around $150 each, adding them as I needed the extra storage. The first holds my cotton fabrics, the second threads, synthetic fabrics and yarns and the third all the other bits and pieces. A built in wardrobe with mirrored doors helps to create more light.
All the cotton fabrics are stacked in colour-ways. Handpainted and multicoloured fabrics have their own stack as do very long pieces. The white woven crates hold dressmaking fabrics.
Setting them out this way means I can find a value or colour very quickly and it's easy to see any missing colours - right now I'm low on oranges, bright sky blue and lime greens.
To stop fading i've made a curtain from 100% UV block out fabric and drawn a design on it. I've also made curtains to fit the room with a layer of this block out under a layout of thick upholstery weight fabric. It helps to keep the heat down as well.
The top of the second bookcase has tubs of threads sorted into type (I have separate tubs for cotton, wool, poly, metallic, decorative extra-thick, spools, bobbin weight, viscose, silk and rayon). Rayon felts are on the top shelf with synthetics and organzas underneath.
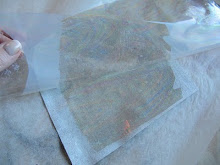
I use very sheer organza for layering and doing heat work. These are too slippery to stack so they are folded according to shade and pushed tightly into plastic boxes. This makes them easier to take out to the kitchen which is handy as I use the flat glass hot plates to do my heat gunning and soldering iron work.
More threads boxed according to type.
Thicker synthetics I keep on a separate shelf and are often used mixed with cottons for art quilts or in my burnt works. These shelves could do with a re-fold too! Being slippery it's hard to get them perfect.
Boxes house yarns for the embellishing machine and couching. More woven crates hold upholstery and fabric samples plus clothing items from opshops etc that can be repurposed in burnt works.
The third book shelf has plenty of boxes from a $2 store that I have labelled. These hold notions, UFO's, roving and the like.
My Babylock overlocker and Pfaff embellisher sit in the bookshelf when not in use.
Scraps have been organised in snap lock bags according to colour range and then put in these tubs for doing small fused pieces and confetti quilts.
A coat rack found in the bin room on our floor makes a good hanger in a space that would be otherwise too narrow to use for anything else.
An old stretch canvas painting forms a makeshift pin board for displaying some of my smaller works.
I've tacked a large piece of white flannelette to the wall to use as a design board. I love how most fabrics just cling to it without pins and it helps me to keep an eye on the bigger picture while making components for a work. When not in the middle of a large project I can use it as hanging space.
The floor lamp is a $30 uplight that was capable of taking a 100w globe from Bunnings and is essential when sewing at night. I've also put a fluro tube above the middle bookcase.
Even behind the door is utilised with hooks for handbags (there's just no-where else to keep them!) and large watercolour paper. The polystyrene is used to bounce light for photography when there's not enough even light naturally.
On the left hand side of the wardrobe a repurposed bedside tables has stacked racks on top holding all the silks i've collected while travelling. Sadly these have to share with my hubby's pants as the wardrobe in the bedroom is stuffed tighter than an emo band lead singer's pants.
The top of the wardrobe shares towels with Coco the wonder dog and rather inexplicably a basketball- all my wool fabrics and synthetics that don't seem to fit in anywhere else are stuffed into a crate here.
The bottom RHS of the wardrobe fairs a little better - battings and anything else on bolts or in rolls fills up the corner including Lutrador, Tyvek and bamboo sheets for felting. Novelty fabrics are folded into a box on their left which sits on the very large pieces or white on white and black and black backing fabrics I have.
The top of the wardrobe has flannelettes and a box of mending.... almost out of sight out of mind :)
Colorbond Steel fabric painting area with brushes in stainless cutlery containers and paints in CD shelving (both Ikea).
For painting fabrics I've set up a panel of Colourbond Steel in the lounge room. The coating Colorbond has means it won't rust and gives the metal a nice smooth service to work on. It's non porous so paint and water sits on top and nothing sinks in - so while it can stain it's easy to clean. To make it sturdier I used silicon glue to adhere two pieces of L shaped aluminium tubing from the widest part at the bottom to the centre of the top. This cuts down on wobbles and ensures it stays in place. Wet fabric can be smoothed onto the steel and stays in place even when dry - but to help ensure it doesn't start to peel off I use some magnetic vinyl strips or other fridge magnets. A sheet of thick clear plastic sits underneath with the length rolled up in front. When the board is in use it's simple rolled out to protect the carpet.

Besta CD/DVD storage from Ikea makes great fabric paint and marker storage. We have gone digital files only with CD's so it was nice to find a second use for these shelves.